Senior Sec pt. 16 I made it…literally

This is my 16th post, and this assignment is due today, on the 16th of May.
Coincidence, no?

For my last post, I’m just tidying up all my files, making sure things are uploaded to the right place, and checking my work against the marking rubric to assure myself that I’ve done all the required work to an excellent standard. This has honestly taken more than a couple of hours.

In this whole process of writing my unit of work and lessons, I’ve been highlighting everything in my word docs that I’ve needed to link resources to/complete/fix/edit.

Yellow nearly everywhere, I know 🙂

Screen Shot 2016-05-16 at 5.04.55 am.png

But I’m getting there, slowly but surely.

I find it cool that in SeeSaw, you can ‘join the classroom’ through a QR scanner. Seesaw actually gives teachers a printable instructions PDF for students to use (page 2). I found out that you can scan the printed piece of paper using the camera of your device, which helps, so that you don’t have to use your phone, but could use your macbook instead. The only thing is that it wastes trees. Maybe if you took a photo of the QR code on your phone and used that instead of paper? Hmm, I might test that out to see if it makes life any easier for the marker of this assignment (Update: And nope, it didn’t work).

The problem with getting text class codes to join a SeeSaw class is that they expire after 15 minutes. (Sorry to whoever is marking my assignment! If I had known, I might have experimented with another LMS that I haven’t used yet). So unless the marker is going to mark my assignment as soon as I submit it, I don’t think that option will work. They might just have to email or message me to send them a link that they have to open within 15 minutes!

Screen Shot 2016-05-16 at 5.34.03 am.png

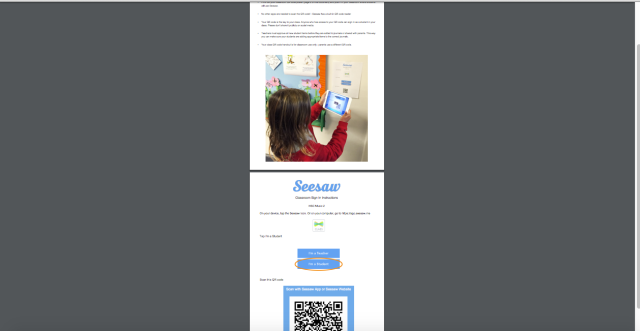
I realised that you have to use the QR scanner FROM THE SEESAW APP! So I downloaded it on my phone and it worked! I just didn’t read the instructions properly. Woops..

I’ve also individually linked each resource to a url on my unit of work document. So that just in case the marker isn’t able to get onto SeeSaw (and see the bit of extra work I did to put everything onto an LMS for my hypothetical students), the files are still accessible.


Also, I realised that I can’t just copy and paste the link from Popplet into Seesaw, because popplet requires you to type in people’s email addresses… See?

Screen Shot 2016-05-16 at 6.08.12 am.png

But, I’ve given instructions to the marker at the bottom of my unit of work on how to access everything, or to message me their preferred email address so that I can personally add them when they get around to marking!

I’ll be back, I’m just going to check everything one more time before I post this, and finally submit it!

PHEW #thatfeelingwhenyousubmitanassignment

Screen Shot 2016-05-16 at 4.39.36 pm.png

Yes I only have 35 words I just put my Unit of Work files in a dropbox file and that’s the blue url that you can see in my submitted document.

So thus concludes my blogging about this unit of work and long hours of awake-ness.

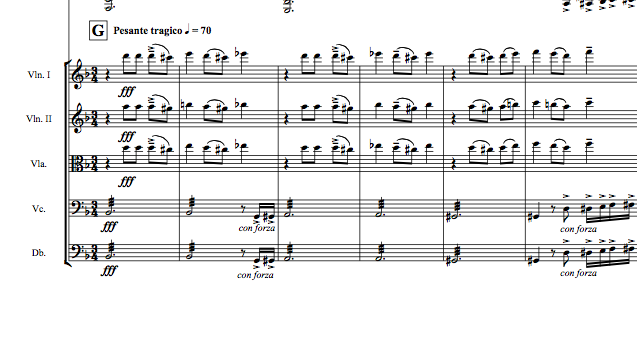
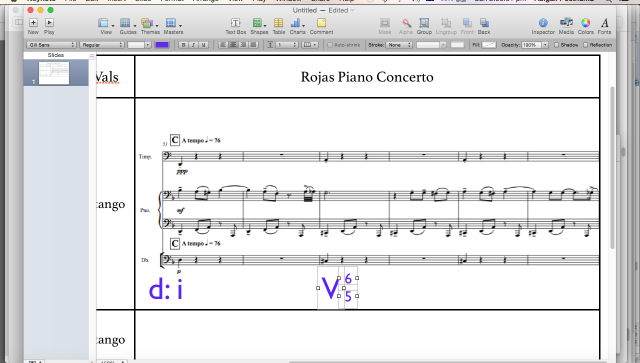
(I need to go to a 3 hour orchestra rehearsal, like now!) – SUSO, the orchestra that played Rojas’ piano concerto and led me to his piece!

Anyway, I hope you all found my processes rather interesting to read about.

Until next time, (hopefully there’s no next time, but I’m guessing we might have more this blogging next semester!)

Abi 🙂

Senior Sec pt. 15 “Wheel decide”

Introducing….. Wheel Decide!

Get it? Wheel decide – We’ll decide!

Papel de Parede - Meme - Ba Dum Tss

I tried to:

Well, actually, the circle

Okay, enough with the puns.

Screen Shot 2016-05-16 at 2.23.15 am.png

‘Wheel Decide’  is an online spinner tool for decision making. They have pre-set circles in different categories, like “Where should I go to eat dinner?” and even have a whole lot for music! Like “What style of music should I listen to?”
(As you can see above – there’s compositional help for those who want to summon their inner John Cage and let their musical decisions result through chance)

It’s cool because you have so many customisable options!
(You can even enter in up to 100 options in the wheel!)
But I wouldn’t do that..would I?

Screen Shot 2016-05-16 at 3.11.39 am.png

I had a look at a the last 5 years worth of music 2 past papers to look for ideas for my next provocation resource. Students will use it to determine their topics for their debate activity. I was going to use it as a provocation tool for an essay topic, but I think debates are far more exciting than essays, don’t you think?
And plus, I’ll be giving students an essay question later as part of the MUED4602 assignment regulations. Also, I could also have made this resource for a possible student research/presentation task, but that’s a little boring and overdone. So I chose to incorporate debates instead (This is partially because I remember getting fired up and really passionate about a debate activity that I did in my HSC Japanese Extension class haha). 

I think debates are great ways for students to succinctly articulate their point of view, whilst being under the pressure of time constraints. Since you’ll never know what the question will be, debates really get you to think on your feet, which students will have to get used to during their HSC exams anyway.

So anyway… I added in as many provocations as I could think of, whilst looking at my compiled list of ideas from previous HSC exams. (But I had to fit them into an ‘agree or disagree’ kind of statement to for the purpose of the debate.

And here is the finished product! (Tbh this screenshot makes it look a little but tacky, but I think it looks much better in the browser)

Screen Shot 2016-05-16 at 3.35.34 am.png

I even tried embedding it into this post by copy+pasting this, but WordPress wouldn’t let me. Boo.Screen Shot 2016-05-16 at 3.32.32 am.png

So I took out the “<iframe src=” part at the beginning and end, and copied the url to a fresh tab in my browser. It worked, but the url was super long! So I used the goo.gl url shortener.

Screen Shot 2016-05-16 at 3.38.07 am.png

Voila!

http://goo.gl/GrAHjb

This was quite a fun one to make! Even at 3 in the morning xD
I hope to use this sort of resource in my future classes!

🙂


Senior Sec pt. 14 ‘elbow cadenza’

So I’ve come to a realisation that I seem to be making a lot of resources.
I’m trying to do well in this assignment! But you know what, I’m actually having quite a bit of fun making these resources. I actually have tonnes of ideas! But so little time…

I’ve been adding resources into Seesaw, an LMS/blogging site that I will be getting hypothetical students to use throughout the unit.

Screen Shot 2016-05-15 at 11.40.45 pm

Where’s lessons 2 and 3? I’ll have to check…haha


I’m wrapping up the loose threads of my resource planning for the rest of this unit of work.

I’ve made a short arrangement (it’s not really mixed bag, as it’s designed for the 5 hypothetical students in the class, plus the teacher on claves) of the couple of bars before and after the cadenza in the Rojas 1st movement. (Now you can see which instruments I chose to find pieces for!) I also had to pick and choose which parts I chose from the Rojas score, because the original is quite thick and has a lot to choose from. So the parts (like the cello at the 2/2 section is from the trombone part in the original, because it’s just doubling the bass.)

From this:

Screen Shot 2016-05-16 at 1.36.19 am.png

To this:

Screen Shot 2016-05-16 at 1.15.24 am

I didn’t want to infringe any sort of copyright, uploading images of Rojas’ score, so I only took a sample from his score, where you can’t tell where the bars are, or even the images. So I think I’m being a bit overly cautious, but oh well, better safe than sorry.

This arrangement is for an activity where students get to improvise their own cadenza, exploring extended techniques on their own instruments, after they watch Daniel himself play an amazing cadenza:

I know I’ve linked it in one of my first blog posts, but it’s amazing, so you’re going to have to watch it again hehe 😉 If you do, then you’ll understand the title of my post.

I’ve got to tick off two things on my resource ‘to-make’ list, and then I’m going to so some final editing in my unit of work. Hopefully I’ll get to sleep tonight!

P.S. I’m excited for the next resource. It’s rather snazzy! Stay tuned.

Senior Sec pt. 13 interconnected interactivity

Part 13?! Are you sick of my blog posting yet?
Is this going to be my unlucky last blog post 13?  

Nope.
Too bad haha 😉

Anyway, this post is going to be short and sweet, because I made this resource in my initial lesson planning stages, and completely forgot that I had made it. I’m blogging about it now because it’s in the sequence of lesson plans, which I’m editing/finalising at the moment. The resource is an interactive mind-map in which students can collaborate to create shared mind-maps. Here’s what it looks like:

Screen Shot 2016-05-14 at 8.21.56 pm.png

As you can see, all the concepts are not there, and there’s certainly not a lot of examples.

This is because students will fill it out throughout the course, based on their analysis of the set work. They’re gathering examples of analysis that they can look back on as they study for the exam. (Students could even use it as they go through their analysis guidebook that I posted about earlier.) You see that big blue square? It’s got 2 staves of music that I uploaded as an example of how the concepts is used. When you double click on it, people can write comments. You see those coloured dots at the top of each box? That’s the name of the person who added it. So it’s very feedback-y, and interactive, and you can monitor which students are doing the work, which I like.

How did I make it, you ask? I  used this website called Popplet, that hosts these sorts of mind-maps. There is a free and paid version. The free version only lets you make up to 5 Popplets, which is okay for this unit of work, but not great if you want to keep using it for the whole Music 2 HSC course. It’s very user-friendly, with easy to understand tutorials. Just double-click and type. And drag to link. So simple. What’s even better is that it has an export function, to pdf or jpeg, so these mind-maps can be printed out if students want to cram last minute before their exams..
(but they shouldn’t have to cram because my students should be well prepared if i’m their teacher haah)

Almost done! 🙂


Senior Sec pt. 12 ‘Lesson 6 Cop out’

When reading the ‘body’ section of my 6th lesson plan, I saw that I had written “students will use given resource” in the student column, and “teacher will give resource to complete analysis activity” in the teacher column. Haha, what a cop out, Abigail. I didn’t even write what sort of analysis activity OR what sort of resource I was going to make!
I must have been tired when writing that last lesson plan… So I had to think of something for students to do in that section of the lesson.

But it’s okay, I made the analysis activity based on a resource that the class had used before.

So, in the introduction of this lesson, I decided to incorporate Padlet into a brainstorming activity whilst listening to the 2nd movement of the piece, for students to quickly jot down any dynamics or expressive techniques that they observe, collaboratively, using any device! (It could really be used for quick collaborative ideas about any concept, but this lesson is going to focus on dynamics and expressive techniques). Those ideas will be springboards for discussion and analysis later in the lesson.
(I got the idea from one of our classes with James last year – must have been junior secondary or something…except I couldn’t remember what website he used, and spent ages trying to google it.)

As part of a series of composition activities, I have made a couple of Sibelius templates with snippets of Rojas’ 2nd movement in it, for students to compose their own ideas based on whichever section it is. Their compositions will have to show BOTH a sense of unity and contrast in it – they’ve been analysing it in the previous activity.

Personally, I found this section quite interesting! It’s a perfect example of unity and contrast too. The flute and trumpet melodies are exactly the same contour (UNITY), any nearly all the same intervals, EXCEPT that the notes are mostly a semitone apart (CONTRAST). There’s so much more I could pick out in this short section, describing unity and contrast, but I still have things to do, and I’m sure you don’t want to read too much!

Screen Shot 2016-05-15 at 7.47.51 pm.png

That’s all for now! 🙂

Senior sec pt. 11 ..story time ♬♬..

*NARRATOR VOICE* A long long time ago, (in the year 2012) there was a high school girl called Abigail who sat cross-legged on the soft carpet floor her music class, wondering what they were going to do in the lesson. She knew that the piece of music that they had been looking at for the past couple of weeks really sounded strange. It was like the composer had chosen any random old note and stuck it anywhere. It really didn’t make sense, and didn’t sound so great either. She wrinkled her nose at the thought of having to listen to it AGAIN. But as the teacher sat down in front of the class on his seat (which was a small ‘kiddy’ seat and far too small for his tall frame), and narrowly balanced his laptop on his knees, he announced “this piece has a tango in it.”

“No way,” someone uttered under their breath. Abigail couldn’t believe it either. Tangos were supposed to have such flair and passion. This piece is so jumbled and confusing…it doesn’t even have a proper key – I though tangos were supposed to be in a minor key…

But as the patient teacher worked through the analysis with the class, Abigail finally got it. The composer used ideas tango, but manipulated them in her own way to construct that a particular section of her piece. So it didn’t necessarily sound like a traditional tango, but a modern version of one, once you’ve realised it.

In that lesson, they brainstormed ideas about what comprised a tango, and even made up one themselves, improvising on their own instruments. It helped Abigail to understand more about the stylistic influences of the piece they were studying, as well as help her be a bit creative in the midst of her HSC.


Fast-forward 4 years, and now Abigail is interviewing Daniel Rojas at the Sydney Con upstairs cafe about his piano concerto.

When Daniel Rojas told me that he used tango in his piece, I was like “Okay, great!” jotted it down on my laptop, and in my head said, “I can’t remember that….what tango?”


But as I listened to the recording, I heard some tango-like qualities in the 2nd movement, and tucked that away in the back of my mind, to pull out later. And that time is now.

I decided to incorporate that improvisation activity from when I did the HSC into my unit of work as well, because I think it’s not only a great ‘hands on’ activity, but it helped me understand a bit more about the construction of the piece that I was studying at the time. I’m just going to push the tango activity a bit further.

So, I chose to use Libertango by Piazzolla as the model of what a tango is.

Students will firstly use it as a dictation activity, and will notate it as a class on a computer with Sibelius, projected onto the screen. (They could also just notate it on the board, but at least they can play it back on Sibelius)

I notated the melody of Libertango quickly in Sibelius, just in case students need a concrete answer, but students will figure it out anyway as a class.

Screen Shot 2016-05-15 at 1.58.44 pm.png

They will analyse the recording of Libertango aurally, and will come up with ideas of what a tango is made up of (scaffolding towards an improvisation here!)

I found this really good website about tango writing that makes it very easy to understand how to write a tango. If I were an HSC student, I would be able to understand it and apply it to my learning. So, I was a bit conflicted as to whether I should I try to make an interactive resource, using the same type of content on the website myself. But it’s all there! Do I want to use up time to ‘copy’ the the content to make the same type of resource?
I know that it’s great to have a good model to base your work on, but at the same time, do I need to attempt to improve something that’s already good? Probably not. So I decided to use the website as part of a lesson activity, and supplement it with resources that I’ve made myself. Yay, internal conflict resolved.

As I went back to the Rojas score to analyse the tango elements in the second mvt., I realised that Rojas didn’t actually use rules of the tango, as in the website above. I was like, “whhhaaaaaat? I’m pretty sure I heard something tango-like in the 2nd movement.. I then discovered that it’s in 3/4, instead of 4, and actually has the waltz like first beat emphasis 1-2-3, 1-2-3. So, with a bit of googling, I found out that there is a dance form from Argentina called “Tango Vals.” So yay for cross-over..saved that one! (I really didn’t want to get rid of the Libertango activity). So, students will get to see both sides of tango and waltz, through the Tango Vals form. (Why didn’t I just look at the title of the 2nd movement? It’s called “Valses” duhhhh)

I made a keynote file to project on a screen in the class, with examples of the Rojas, compared to aspects of tango as the class discusses/analyses of the score together.

Screen Shot 2016-05-15 at 2.55.58 pm.png

Notice how I made the V6/5 (with 3 separate text boxes aha).

Here’s the pdf export of the keynote file, which I put on Seesaw, if the students want it. Actually, the teacher doesn’t have to use the keynote, they could just use the pdf if all they’re going to do is show it in class. But I think that using the keynote application will make it look good on the screen, because it will adjust the specs.

Analysis of tango vals:rojas

Anyway, that’s all for now!

The end.

I hope you enjoyed my little ‘third person’ story at the beginning. Just shaking things up a little 😉

Senior Sec pt 10. unnecessary editing in iMovie

For my next resource, no, I didn’t make a movie. I just used iMovie to construct it.

(I didn’t realise that I could just let Sibelius export a score and audio together into a movie file. I guess that’s what happens when you get an update – you don’t realise the full capacity of the software) – so I could have saved some time. Oh well, at least I learnt something new 🙂

I’ll just outline my alternative process then. So, the resource that I wanted to make was going to be a supplement to the activity going on in the class. In the activity, students are going to learn about a way Rojas uses cross rhythms/hemiola in a section of his piano concerto, in different layers.

Here is the example I’m talking about:

Screen Shot 2016-05-14 at 10.52.34 pm

Notice how the piano is clearly showing a sense of 6/8 through the dotted crotchet subdivision. But also notice how the upper strings and cello look like they should be written in 3/4? That’s the rhythmic idea that students will be studying in a certain lesson.

In order to do that, students are going to have to learn the parts rhythmically (through clapping or perc. instruments) by rote. However, since students highly trained in WAM can be highly dependant on score reading, there is the looped one that I have made, that can be put on a screen and listened to. That way, students can also play with the audio, listen out for the specific layers, as well as see how the lowest common denominator (the quaver), ties everything together, through the cross rhythms.

My method of making it:

*Notating it in Sibelius – picking out the most important rhythmic elements. (I left out the bassoon and double bass because they don’t have a particular rhythm that adds anything extra to the texture)

*Exporting to pdf

*Copy+Paste, Copy+Paste, Copy+Paste, Copy+Paste, Copy+Paste in Sibelius, so that when I exported the audio, it was longer than 10 seconds. (I’m not sure if Sibelius can ‘infinitely repeat.’ To be honest, I tried putting in that text, and it didn’t work)

Screen Shot 2016-05-14 at 10.51.42 pm.png

(*facepalm*)

*Export the audio.

*Put the pdf and the audio in iMovie, and export. Voila

Screen Shot 2016-05-14 at 11.14.00 pm.png

*Lastly, I imported the file to SeeSaw, my online LMS where students will be getting files, blogging, and everything else we use our LMS for.

Screen Shot 2016-05-14 at 10.49.58 pm.png

It’s a fairly simple resource, and not mind-blowing at all. But it’s good for a supporting resource in class, especially if students need to visualise what they’re performing. And it makes for  a good starting point to talk about it after the performance activity.

That’s all for now! 🙂

Senior Sec pt. 8 almost 24 straight hours

Let’s just say, I lost a lot of sleep last night. Well, all night. I slept for about an hour from 8-9am this morning. It’s because this resource takes so long to do. From Thursday evening to midday today, this is all I was working on. HOWEVER, it am very excited about it, because it looks great!! And I think it will be super useful for students!

Introducing, my adventure-book-website-analysis-guide! I don’t really know what to call it.

Screen Shot 2016-05-14 at 3.01.03 pm

Students are guided through this ‘pick-the-ending-yourself’ style analysis guide, and can use it for ANY piece they want to analyse (probably all their Mandatory pieces).Screen Shot 2016-05-12 at 11.54.09 pm.png
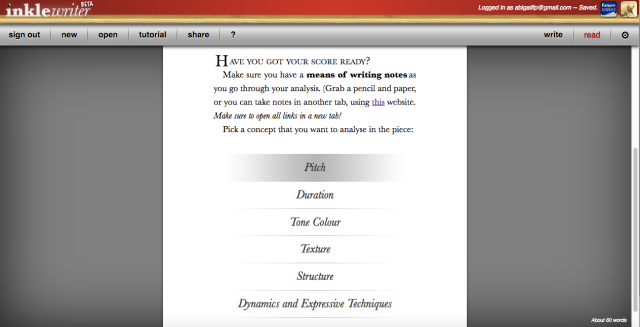
All they have to do is open the underlined link on the first page – as you can see, and voila, they have an in-browser notepad to take down notes. And believe me, they’re gonna need it.

So based on what category students pick, they get to find out ways of analysing certain concepts of music, as it is broken down into sub-headings and instructions for them. As they answer the questions, they are being led to analyse the piece for themselves. At the end of exploring the concept, there are choices of provokations/short questions (that resemble essay questions) for them to answer, based on what they analysed. It’s sort of like gamification of learning! I read this article about gamification and its potential for learning, and I liked this statement:

“Play is an appealing way to learn, one that is neither coercive nor prescriptive. It lacks the bitter tinge of will-thwarting authority and thus engenders less resistance in the learner” (Hughes & Lacy, 2016, p. 323).

I thought that it relates interestingly to the resource that I’m making, because I’m using a game-like-pick-your-own-ending-story-music-analysis-guide as the ‘game,’ but it’s not really a game. Students are sort of ‘playing,’ because they’re choosing their own paths with an interactive resource. However, the resource is quite ‘prescriptive,’ because it tells students what to do, based on their options. It somewhat ‘thwarts’ students’ wills, but it’s also the students who has chosen to pick that option. So, it’s clashes with this statement, which is why it stood out to me as an interesting view to consider, whilst thinking about this resource.

There are TONS of different outcomes, which is why it took me so long, sitting in front of this screen.

I had to individually write in every single option/instruction, and choose to link it to a new option, or existing one. By the way, I didn’t mention, I used a story writer platform at writer.inklestudios.com. I was going to use twinery, the one that James mentioned in class, but I felt like this one was easier to understand. This platform is intended for writing stories, but it actually has really good features that worked well for writing an analysis guide. It tells you when there’s a link that ends, and hasn’t been looped yet, or if there’s problems with your linking (like you haven’t finished writing a certain section and forgot about it). Check out these maps that you can use to check how your ‘story’ interconnects:

Screen Shot 2016-05-13 at 3.51.12 pm

This is from about 18 or so hours ago ^

Screen Shot 2016-05-14 at 3.22.43 pm

This map is from today! There’s a lot more inter-relatedness.

It’s great because I can just save it in the browser, through using my email address that I had to set up a login and password with at the beginning. I didn’t even have to open one of those annoying verification emails to activate the account. 🙂

The downside of this platform: It doesn’t let you upload any of your own files. So, that’s why the reason for my last blog post was to experiment whether I could upload my own images here, and link the images through inkle writer. But it didn’t work, so I ended up using boring creative commons images..

But on a more positive note, those blue words you can see are links to external websites like youtube, which can supplement students’ learning of that particular idea if they choose the option to.

Anyway, I’m quite pleased with this resource. I was going to try to turn it into an app for any device, but decided that I’ve got other resources to make that are of higher priority. I’ll get back to it if I have time, before this assignment is due.

Anyway, that’s all for now ^_^


References:

Hughes, M., & Lacy, C. J. (2016). “the sugar’d game before thee”: Gamification revisited. Portal : Libraries and the Academy, 16(2), 311.


Senior Sec. pt. 7 image post testing

I’m using this blog post to upload images of files that I need to link to my next resource. I know it sounds weird, but the platform I’m using needs a website url to insert images, instead of me just uploading images. I’ve used a few wiki-media commons images, but I need some specific example.

I’m being kind of vague about this resource at the moment (I’m not giving away my secrets yet haha). Just bear with me, and all will be revealed sooner or later. (Probably ‘later’ because of how long it will take me) 😛

Screen Shot 2016-05-13 at 10.43.24 am.png

UPDATE:

…aaand it didn’t work. Maybe it has to be public domain images?

Senior Sec. pt. 6 Confuzzling concepts

I was thinking about the next resource that I’m making, and I thought about having a look on our LMS to find a recording of a senior sec class – no, not the one where James erupts about the term ‘duration’ – I wasn’t in that class..but I sure heard about it! So anyway, I wanted to watch that same activity, but in my class (where James doesn’t erupt haha), because I remember breaking down the concepts into main sub-points, which would be useful for my next resource.

So I watched that part of the lecture, and took down notes (as you can see below) on the ‘higher order’ break-down of the concepts. (I gotta say, some of the stuff that goes on, or the things that you can hear people say in those lecture recordings – is quite amusing!)

20160512_212157.jpg

Woo, scribbly writing. (I couldn’t pause the video for some reason)

Anyway, the reason why I needed to listen to all those concepts being broken down into sub-headings is because of the intended nature of my resource. I could have probably done it myself, but I can now say that I’ve looked at lecture material as part of resource research, (try saying “resource research” quickly – #tonguetwister xD ) as well as getting affirmation on some sub-headings that I may have forgotten. Plus, it’s great to be reminded of some useful points that James made about teaching concepts, and how to approach them in an actual class.

So, the resource. It’s going to be like those adventure stories that have multiple endings, except it guides students through an analysis of any piece. So it’s like a “how to analyse music” guide based on concepts of music, and students choose how they approach it, based on the choices they make!

Time to go and make it!